
Arc Raiders: Complete Furtive Meetings Quest Guide
Track every secret meeting point in Stella Montis, secure the intel, and extract safely with this detailed Arc Raiders quest guide.
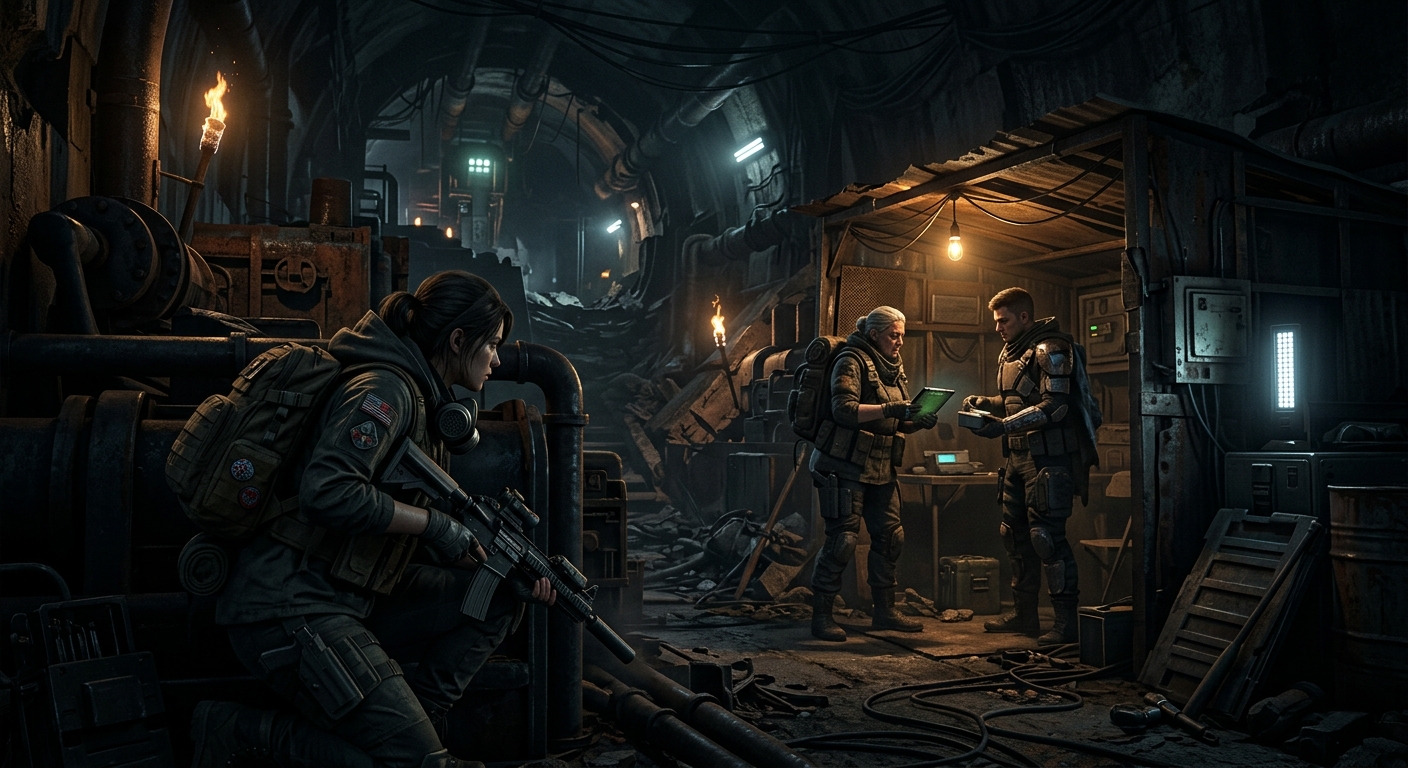
The Furtive Meetings quest in Arc Raiders is one of the more confusing objectives on Stella Montis. You must locate several secret meeting points, document them, loot a key item, and then successfully extract in a single run. If you are still learning the layout of the facility, this quest can easily burn through your time and gear.
This guide walks you through every step in a clear order: how to start the quest, where to find each secret meeting spot, how to secure the Secret Meeting Info, and what to watch out for on your way back to Speranza.
Overview of the Furtive Meetings Quest
Before you head into Stella Montis, it helps to know exactly what the game is asking you to do. Furtive Meetings is essentially a multi-stage scavenger and recon mission that must be completed in a single deployment.
Quest Objectives at a Glance
- Reach Stella Montis and navigate through Medical Research, Robotic Sandbox B, Seed Vault, and the corridor leading to the Cultural Archives.
- Interact with three different secret meeting spots and photograph each one.
- Search a container at the final meeting area to obtain the Secret Meeting Info item.
- Extract safely and return the item to Shani in Speranza.
Why Furtive Meetings Feels Difficult
Most players struggle with this quest not because of tough combat, but due to:
- Map complexity: Stella Montis is a layered industrial complex. Corridors loop, stairwells intertwine, and signage is easy to miss during firefights.
- Single-run requirement: You must complete all steps without dying or leaving the area. Extraction failure means starting over.
- Subtle visual cues: Meeting spots are marked with small symbols or environmental details that are easy to overlook when you are rushing.
Recommended Player Level and Loadout
While the game does not strictly lock this quest behind a level requirement, you will have a much smoother experience if you bring:
- A mid-range primary weapon (assault rifle or versatile carbine) for both tight corridors and open rooms.
- A sidearm or secondary suited for close-quarters work.
- At least one healing item or defensive tool to recover between engagements.
- A movement ability or gadgets that help you reposition quickly if your build allows it.
Arc Raiders, as a co-op third-person shooter, is designed around team play and coordinated abilities according to the game’s original announcement materials from Embark Studios and Nexon.1 Tackling Furtive Meetings with friends greatly reduces the chance of losing the quest item during extraction.
How to Start Furtive Meetings
The exact dialogue and handoff for the quest can vary with progression, but the core loop is always the same: pick up the objective at Speranza, then queue into Stella Montis where the task is active.
Confirming the Quest Is Active
Before deploying, double-check:
- Your quest log shows Furtive Meetings with all steps uncompleted.
- The description mentions photographing secret meeting spots on Stella Montis and recovering Secret Meeting Info.
- You have at least one safe pocket or secure inventory slot available for the key item.
Understanding the “Single Raid” Constraint
All three photos and the intel pickup must occur in a single session. If you disconnect, die and fail to extract, or leave without the item, you will need to repeat the entire sequence. This structure is similar to how extraction-type shooters like Escape from Tarkov handle multi-step tasks that are bound to one raid, a design pattern noted in several game design analyses of the genre.2
Secret Meeting Spot #1 – Medical Research Staircase
The first location is in the Medical Research area, in the most southwestern portion of that zone.
Finding the Medical Research Zone
- Open your in-game map and locate the Medical Research label.
- Move toward the southwest corner of this area. You are aiming for the very bottom-left of the Medical Research layout.
- Look for narrow corridors leading to a more secluded corner, away from the main laboratories.
Locating the Staircase Meeting Spot
Once you reach the target quadrant:
- Find a staircase that spans at least two floors.
- Head to the bottom-most section of this staircase; the secret meeting spot is directly underneath it.
- Look for subtle markings or graffiti on the wall indicating this is a clandestine rendezvous point.
When you are positioned correctly, an interaction prompt appears allowing you to photograph the meeting spot. Use the prompt to record it. If you move away and the prompt disappears, adjust your position closer to the markings.
Combat and Navigation Tips for Spot #1
- Check corners: The stairwell area has blind angles; clear enemies before focusing on the photo.
- Stay mobile: Raiders and hostile units can flank from upper floors, so avoid camping in the open.
- Use minimal noise: If possible, dispatch nearby threats quietly to prevent a swarm that delays you.
Secret Meeting Spot #2 – Ventilation Shaft Near Robotic Sandbox B
The second secret meeting point sits between Robotic Sandbox B and the Seed Vault, near a ventilation structure on the lower levels.
Moving from Medical Research to Robotic Sandbox B
After finishing the first photo, you have multiple routes depending on your spawn and current map control. As a general rule:
- Head toward the industrial and robotic testing sections of the facility.
- Look for signs pointing to Robotic Sandbox or similar robotics-focused labels.
- Use intermediate hallways that keep you under cover instead of long, exposed walkways.
Embark’s level design tends to alternate between open arenas and tight corridors to create varied combat scenarios, a technique commonly discussed in third-person shooter design.3 In this leg of the trip, you will mostly deal with close-to-mid-range skirmishes.
Pinpointing the Ventilation Shaft Meeting Spot
From inside or near Robotic Sandbox B:
- Move toward the side of the zone that connects to Seed Vault (typically the eastern direction on the local map).
- Descend to the lower level if you are on an upper catwalk or platform.
- As you head toward the hallway leading to Seed Vault, watch for a
. - On one of the walls nearby, you should notice a symbol or mark similar to the first meeting spot, indicating another clandestine rendezvous.
Once again, get close enough to trigger the interaction prompt and photograph the meeting spot. If it does not appear, reposition until you are directly facing the marked wall.
What to Watch Out For
- Vertical threats: Some enemies may approach from upper gantries. Keep an eye on staircases and ramps.
- Crossfire: The approach corridor to Seed Vault can line you up for long sightlines. Use cover liberally.
- Resource management: You are only halfway through the quest; avoid spending all your ammo or consumables here.
Secret Meeting Spot #3 – Staircase Between Cultural Archives and Seed Vault
The final photo location lies in the corridor that connects the Seed Vault to the upper level leading toward the Cultural Archives. This is also where you will find the container containing the Secret Meeting Info.
Getting From Robotic Sandbox B to Seed Vault
If you followed the path through the ventilation shaft area, you should already be close to Seed Vault. Otherwise:
- Follow signage toward Seed Vault from the robotics sector.
- Use ramps or elevators to reach the main Seed Vault level.
- Once inside, orient yourself toward the corridor that leads upward to the Cultural Archives and Atrium.
Locating the Connecting Staircase
From the Seed Vault interior:
- Find the hallway that links Seed Vault with Cultural Archives. Signage usually points to multiple destinations here, including the Atrium.
- Follow this corridor until you reach a staircase that forms a junction between these areas.
- Head to the bottom of the staircase. Near the base, on the wall facing toward the Seed Vault direction, you should spot another meeting-symbol marking.
Interact with the prompt when it appears and take the third and final photo of the secret meeting spot. Doing this should tick off the photographic portion of the quest objectives.
Finding and Looting the Secret Meeting Info
After photographing the third meeting site, your next task is to secure the quest item:
- Check the corner near the staircase, usually cluttered with cardboard boxes or containers.
- Look for an object you can search; it may be partially obscured by shadows or clutter.
- Interact with the container to trigger a search animation. When it completes, the Secret Meeting Info item will drop.
- Pick up the item and place it in a safe pocket if you have one available. This protects the item if you are downed before extraction.
| Step | Location | Landmark | Action |
|---|---|---|---|
| 1 | Medical Research | Southwest corner staircase (bottom section) | Photograph secret meeting spot |
| 2 | Between Robotic Sandbox B & Seed Vault | Ventilation shaft on lower level | Photograph secret meeting spot |
| 3 | Stairway between Seed Vault & Cultural Archives | Base of staircase by hallway junction | Photograph secret meeting spot |
| 4 | Same as Step 3 | Container among cardboard boxes | Search to obtain Secret Meeting Info |
| 5 | Extraction point | Any active Stella Montis extraction zone | Extract safely and deliver item to Shani |
Extracting Safely With the Secret Meeting Info
With the intel secured, the final and most nerve-wracking stage is getting out alive. Extraction-style gameplay is built on tension around losing items upon death, and Arc Raiders leans into this same loop that popularized other extraction shooters.4
Choosing an Extraction Route
Depending on your current position and how much time is left in the raid, you have some options:
- Closest extraction: Choose the nearest available extraction zone if enemies are thin and you are low on resources.
- Safer but longer path: If the nearest point is under heavy enemy presence, backtrack to a less contested extraction even if it adds distance.
- Co-op escort: If you are playing with friends, have teammates scout or clear the path while you carry the intel in your safe pocket.
Practical Tips for Surviving Extraction
- Slow down: Sprinting blindly through hallways is a good way to run into patrols. Move carefully and scout ahead.
- Use sound: Listen for footsteps, gunfire, and enemy chatter to avoid ambushes. Spatial audio can be a major advantage according to numerous game UX studies.5
- Top up before leaving: Reload and heal before entering open spaces around extraction zones, where you are most vulnerable.
- Communicate: In co-op, clearly call out your intended route and any threats spotted along the way.
Turning In the Quest to Shani
Once you complete the extraction, return to Speranza. To finish Furtive Meetings:
- Open your inventory and confirm that Secret Meeting Info is still present.
- Find Shani in the hub area and interact to progress the dialogue.
- Turn in the quest item when prompted to complete the objectives.
Completing Furtive Meetings rewards you with quest-specific loot and progression, helping you move further into Arc Raiders’ PvE structure and unlock additional activities on Stella Montis.
Loadout and Strategy Suggestions
While you can complete Furtive Meetings with a wide range of builds, some approaches are especially effective in the tight interior spaces of Stella Montis.
Recommended Weapons
- Versatile primary: Automatic rifles or burst rifles with manageable recoil will handle both corridor firefights and mid-range engagements.
- Close-quarters secondary: Shotguns or high-damage sidearms excel in the narrow stairwells and vent-adjacent rooms.
- Explosives (optional): Grenades can clear clustered enemies near choke points, but use them carefully to avoid self-damage in tight spaces.
Team Roles for Co-op Runs
In a full squad, consider dividing responsibilities:
- Navigator: Leads the team through each zone, calling turns and staircases.
- Point: Clears rooms and stairwells first, engaging enemies head-on.
- Rear guard: Watches for flanking units coming from behind.
- Carrier: Places the Secret Meeting Info in a safe pocket and avoids unnecessary risk.
Frequently Asked Questions
Do all Furtive Meetings objectives have to be completed in one run?
Yes. All three photographs and the retrieval of the Secret Meeting Info must be done in a single deployment to Stella Montis. If you fail to extract or leave without the item, you will have to redo all steps.
What happens if I die after picking up the Secret Meeting Info?
If you die and fail to extract, the quest item is effectively lost from that raid. Unless it was secured in a safe pocket, you will need to revisit all meeting locations and loot the container again in a new session.
Can I complete Furtive Meetings solo?
Yes, the quest is fully possible solo. However, it is more forgiving with a team, as allies can help clear enemies, call out routes, and defend you during extraction. The game’s co-op orientation is a core part of Arc Raiders’ design philosophy.1
Is the order of the meeting spots fixed?
The safest approach is to follow the order described here: Medical Research, then the area between Robotic Sandbox B and Seed Vault, and finally the corridor to Cultural Archives. This route minimizes backtracking and keeps you moving across the facility in a logical line.
Do the meeting spot markings look the same at each location?
While the exact details can vary, each secret meeting area is marked by some form of distinct symbol or environmental clue on the wall. If you see the interaction prompt to take a photo, you are in the right place.
References
- Embark Studios and Nexon Announce ARC Raiders — Embark Studios. 2021-12-09. https://www.embark-studios.com/news/announcing-arc-raiders
- Escape from Tarkov: Raid Structure and Mechanics — Battlestate Games (official game description, for extraction-based quest design comparison). 2020-01-15. https://www.escapefromtarkov.com/game-overview
- Gears 5: Level Design Insights — The Coalition / Xbox Game Studios (developer commentary on varied spaces in third-person shooters). 2019-09-10. https://news.xbox.com/en-us/2019/09/10/gears-5-campaign-design/
- The Rise of Extraction Shooters — PC Gamer. 2023-08-22. https://www.pcgamer.com/the-rise-of-extraction-shooters/
- Designing Game Audio for Player Performance — GDC Vault (Game Developers Conference session on audio and situational awareness). 2022-03-24. https://www.gdcvault.com/play/1027711/Designing-Game-Audio-for-Player
Similar Articles






Read full bio of Sneha Tete