
Battlefield 6: Ultimate Attack Helicopter Loadout Guide
Master Battlefield 6 attack helicopters with optimized loadouts, smart upgrades, and coordinated tactics to dominate every objective.
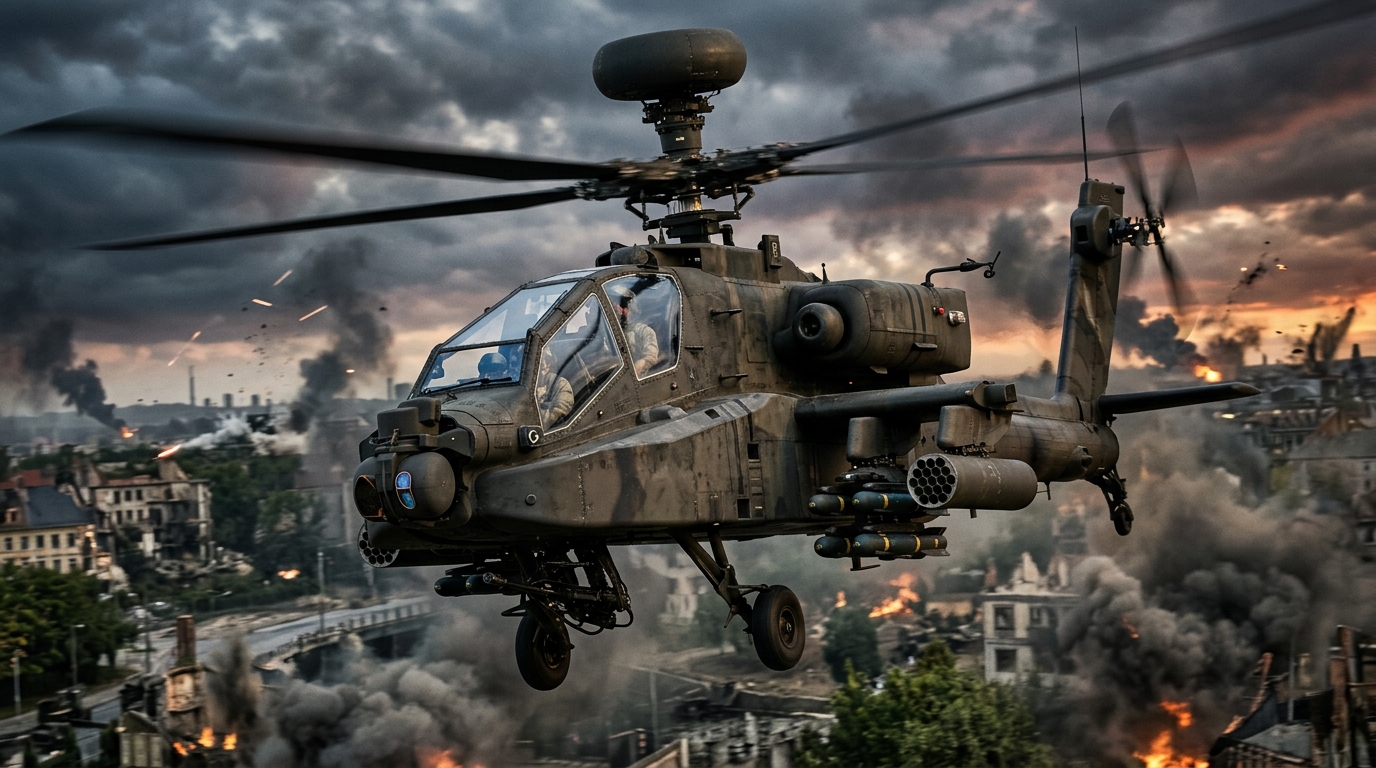
Attack helicopters are the centerpiece of vehicle dominance in Battlefield 6. Flown correctly and outfitted with the right gear, they can erase armor columns, lock down objectives, and give your squad total map control. Flown poorly, they turn into a fast ticket back to the respawn screen.
This guide breaks down an optimized set of attack helicopter loadouts, explains why each choice matters, and shows you how to adapt your setup to different maps, team compositions, and playstyles. Everything here is inspired by common high-level meta trends, but written from the ground up for clarity and flexibility.
Understanding the Attack Helicopter’s Battlefield Role
Before choosing weapons, you need to know what the attack helicopter is meant to do. Think of it as a flying IFV: heavy firepower, strong presence, but highly vulnerable if misplayed. Its main roles are:
- Area denial: Punish enemies pushing open objectives and control contested lanes.
- Anti-armor support: Delete tanks, IFVs, and AA that overextend from cover.
- Infantry suppression: Break entrenched infantry and farm grouped enemies.
- Information & pressure: Force the enemy team to divert resources to counter you.
Every loadout choice should reinforce one of these roles while mitigating your biggest weaknesses: lock-on missiles, poorly timed overextensions, and lack of coordination with your gunner.
Core Loadout Philosophy: Survivability First, Damage Second
The single biggest mistake most pilots make is prioritizing raw damage over survivability. A slightly weaker damage setup that stays alive for five minutes will out-perform a glass-cannon build that dies every 30 seconds.
When selecting gear, follow this hierarchy:
- Stay alive: Defensive gadgets and mobility upgrades come first.
- Reliability: Aim for weapons that are forgiving and flexible.
- Specialization: Fine-tune for infantry farming or armor hunting once you can consistently survive.
| Priority | Focus | Examples |
|---|---|---|
| High | Defensive tools & mobility | Flares, repair systems, armor upgrades, agility |
| Medium | Consistent damage output | Heavy rockets, versatile gunner cannons |
| Low | Greedy damage options | Extra offensive gadgets that replace survivability |
Recommended All-Rounder Attack Helicopter Loadout
This is a balanced setup designed for public matches where you face a mix of infantry, armor, and air threats. Adjustments for specific scenarios follow later.
Pilot Primary Weapon: Heavy Rocket Pods
Recommended: Heavy Rockets (or equivalent high-damage unguided pods)
Heavy rocket pods are the backbone of most meta attack helicopter builds because they:
- Shred tanks and IFVs with well-placed volleys.
- Deal significant splash damage to grouped infantry.
- Remain effective at medium to long range with proper aim.
Unguided rockets demand practice, but once you learn lead and drop, they become the most reliable and versatile option for an experienced pilot.
Pilot Secondary Slot: TV/TOW-Style Guided Missile
Recommended: Wire-guided or TV-style missile (single-shot, high-damage)
This type of missile is ideal for deleting critical targets:
- Enemy armor: Tanks, IFVs, and especially static AA placements.
- Enemy helicopters: Slow or hovering targets are prime candidates.
- Camping positions: Rooftop nests, snipers, or spawn beacons.
Because you manually guide the missile, staying steady and level dramatically increases your control. This matches general missile guidance principles found in aviation simulations, where stable platforms improve accuracy.1
Defensive Gadget: Infrared Flares
Recommended: Flares (chaff/IR countermeasures)
Flares are non-negotiable in most lobbies. With lock-on launchers, air-to-air missiles, and ground AA present, you need a reliable way to break missile locks. This mirrors real-world aircraft survivability practices, where countermeasure systems are essential defenses against guided threats.2
Key usage rules:
- Never panic-pop on first lock; wait for the launch tone or visual missile trail.
- After using flares, immediately break line of sight and change altitude.
- Track likely AA positions and avoid flying straight at them during your cooldown.
Passive Upgrades: Armor & Mobility
Most attack helicopters allow you to pick a mix of passive enhancements. As a baseline:
- Base pick: Extra armor / hull integrity increase.
- Secondary pick: Improved agility or yaw/roll responsiveness.
The combination of extra health plus maneuverability increases your survivability and makes evasion easier, a pattern supported broadly in vehicle balance design where more agile vehicles are better at avoiding damage, while armor provides a buffer for mistakes.3
Specialized Loadouts for Different Team Needs
Once you’re comfortable with the all-purpose build, you can swap elements depending on the match.
Anti-Infantry Focused Loadout
Use this when the enemy team is light on armor but heavy on infantry and AA is manageable.
- Pilot Primary: Standard rockets or high-capacity rockets with larger splash radius.
- Pilot Secondary: Proximity airburst or cluster munitions for infantry groups.
- Gunner Weapon: High rate-of-fire 30–40mm cannon with good splash.
- Gadget: Flares (keep them; infantry may still have lock-ons).
Tips for this setup:
- Fight at medium range; don’t hover over flags.
- Circle around objectives, letting your gunner farm while you poke with rockets.
- Rotate out as soon as you see multiple tracers or hear overlapping lock tones.
Anti-Armor Focused Loadout
Ideal when the enemy team is stacked with tanks, IFVs, and mobile AA.
- Pilot Primary: Heavy rockets.
- Pilot Secondary: TV/TOW-style missile or armor-piercing guided missile.
- Gunner Weapon: High-velocity cannon with strong vehicle damage.
- Passive: Extra armor + reduced damage from explosives (if available).
Execution basics:
- Approach from flanks, never straight down a lane that tanks are watching.
- Use terrain and buildings to mask your approach, then peek, volley, and retreat.
- Coordinate with ground teammates to finish vehicles you disable.
Air Superiority Skewed Loadout
When your main threat is enemy helicopters or jets, lean into air-to-air gear.
- Pilot Primary: Heavy rockets or fast-firing rockets for dogfights.
- Pilot Secondary: Air-to-air missiles or high-velocity TV missile.
- Gadget: Flares (again, mandatory).
- Passive: Mobility and yaw control to win turning fights.
Focus on gaining altitude, maintaining speed, and taking the first shot. Helicopter versus helicopter duels reward pilots who understand lead and momentum; this echoes general principles of air combat maneuvering where energy management and positioning decide engagements.4
Gunner Setup and Team Coordination
An attack helicopter is only at full power when pilot and gunner work together. Even the best loadout fails if your roles overlap or you fight each other for line of sight.
Recommended Gunner Weapons
For most situations, prioritize weapons that are:
- Accurate at medium range: So the gunner can work while you orbit objectives.
- Effective vs infantry and vehicles: For flexibility.
- Stable with zoom: Easy to track moving targets.
A solid baseline is a 30–40mm cannon with moderate splash and decent vehicle damage. Gunners should:
- Prioritize targets on the sides of the helicopter’s facing direction while you keep the nose on primary threats.
- Tap-fire or use short bursts at long range for accuracy.
- Call out missiles, AA, and enemy vehicles for the pilot.
Communication Checklist
Use voice chat or quick pings to keep everyone on the same page. At minimum, communicate:
- “Flares used” – the pilot should say this so both of you know you’re vulnerable.
- “Low on rockets” – plan a disengage and resupply.
- “AA spotted” – mark and remember its location.
- “Disabled tank left side” – coordinate follow-up rockets or missiles.
Positioning, Movement, and Survival Habits
Even with the perfect loadout, bad positioning will get you killed. Adopt these movement habits:
Altitude Management
- Low and fast for approaches: Use terrain, buildings, and hills to break line of sight.
- Medium altitude for farming: High enough to dodge small arms, low enough to land accurate rockets.
- Avoid hovering high: This makes you an easy target for lock-ons and hitscan AA.
Attack Patterns
Replace straight-line runs with predictable patterns:
- Orbit objectives: Fly wide circles around key flags, exposing different angles.
- Strafe and break: Strafe in, fire a volley, then climb and turn out.
- Vary your routes: Don’t always attack from the same direction; defenders will pre-aim rockets and AA.
Threat Prioritization
Whenever you spot multiple threats, use a simple priority ladder:
- Dedicated AA units (stationary or vehicle-mounted).
- Enemy helicopters and jets with air-to-air capabilities.
- Tanks and IFVs near your team’s push.
- Infantry with lock-ons or AA gadgets.
Killing AA and enemy air first extends your lifespan and indirectly boosts your entire team’s effectiveness, similar to how air superiority in real conflicts amplifies ground forces’ ability to maneuver safely.5
Map Awareness and Spawn Timers
One advanced skill is tracking vehicle spawn cycles. If you destroy an enemy helicopter or AA, mentally note when it will return. Many modern shooters follow fixed or near-fixed vehicle respawn timers, making it possible to anticipate when threats will reappear, even if the exact timing varies by game mode and patch.
Practical tips:
- After you kill an enemy heli or AA, count roughly a minute and a half before expecting it again unless your game uses different timers.
- Use this window to play more aggressively, then dial back once you expect counters to be back online.
- Ask teammates to ping fresh vehicles as soon as they spawn so you can plan intercepts.
Common Mistakes and How to Avoid Them
Even experienced pilots fall into predictable traps. Here are some of the most frequent errors and their fixes.
- Overextending into enemy spawn: Fix by attacking from angles that keep at least one escape route behind cover.
- Hovering over objectives: Always keep some horizontal movement going to avoid concentrated fire.
- Blowing flares too early: Wait to confirm a missile launch; many players fake locks or lose sight.
- Ignoring your gunner: If your line of sight blocks theirs, reposition so both of you can shoot.
- Fighting three threats at once: Disengage if you’re locked by multiple launchers or see overlapping tracers.
FAQ: Battlefield 6 Attack Helicopter Loadouts
What is the single most important upgrade for the attack helicopter?
If you have to pick one category first, choose flares or equivalent countermeasures. Without a way to break missile locks, no amount of damage output will keep you alive against coordinated teams.
Are heavy rockets better than light rockets?
For most players and most modes, yes. Heavy rockets are more punishing if you miss, but they deliver excellent damage to both vehicles and clustered infantry, making them the strongest all-round choice once you’ve practiced aiming.
Should I ever drop flares for another gadget?
Only in extremely casual lobbies with almost no lock-on threats. In any serious match, dropping flares is a direct downgrade to survivability.
How can I practice rocket and missile aim?
Spend time in modes or servers with less pressure, and focus on one skill at a time: first learn rocket drop and lead against stationary targets, then moving vehicles, then enemy helicopters. Many high-skill players treat these practice sessions like drills until muscle memory forms.
Is it worth flying solo without a gunner?
You can, but you’ll be weaker. A coordinated gunner dramatically increases your damage output and your situational awareness. If you must fly solo, prioritize weapons that don’t depend on gunner support and avoid overcommitting to deep pushes.
Wrapping Up: Building Your Own Helicopter Meta
The best Battlefield 6 attack helicopter loadout isn’t a single fixed setup; it’s a toolkit you adjust based on the map, enemy composition, and your comfort level. Start from the balanced heavy-rocket + TV missile + flares core, then branch into anti-infantry or anti-armor variants as you gain confidence.
With good communication, smart positioning, and loadouts centered on survivability, you’ll find yourself staying in the air longer, deciding when engagements happen, and turning every match into an airpower lesson for the enemy team.
References
- Introduction to missile guidance systems — U.S. Naval Academy. 2022-03-01. https://www.usna.edu/Users/physics/ejtaylor/missile_guidance_intro.php
- Aircraft Survivability Equipment — U.S. Army, Program Executive Office Aviation. 2021-09-15. https://www.army.mil/article/250646/aircraft_survivability_equipment
- Defense Science Board Task Force on Survivability of DoD Systems — U.S. Department of Defense. 2019-06-01. https://apps.dtic.mil/sti/pdfs/AD1069867.pdf
- Fundamentals of Fighter Combat Maneuvering — NASA Dryden Flight Research Center (archived technical note). 2005-11-10. https://ntrs.nasa.gov/api/citations/20050233044/downloads/20050233044.pdf
- Joint Publication 3-30: Joint Air Operations — U.S. Joint Chiefs of Staff. 2019-01-25. https://www.jcs.mil/Portals/36/Documents/Doctrine/pubs/jp3_30.pdf
Similar Articles




Read full bio of Sneha Tete