
Minecraft Villages: Complete Survival and Trading Guide
Learn how to find, protect, and grow Minecraft villages so you can trade, farm resources, and thrive in survival worlds.
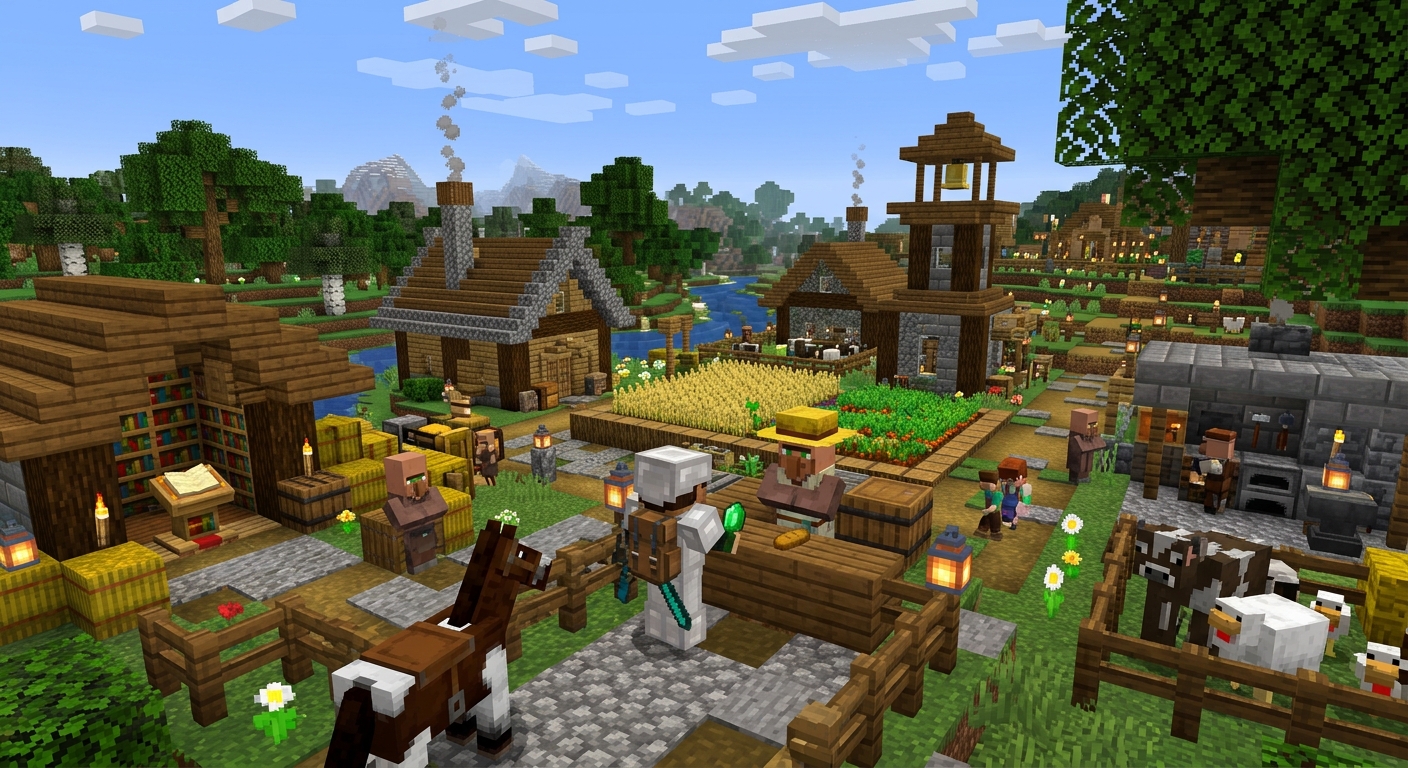
Minecraft villages are some of the most valuable structures you can find in survival. They offer shelter, renewable trades, food, and unique mechanics that can completely change the pace of your world. This guide walks you through how villages work, how to make the most of their inhabitants, and what you need to do to keep your new neighbors alive.
1. What Counts as a Village in Minecraft?
At a technical level, Minecraft defines a village through its beds, villagers, and gathering point (usually a bell). As long as there is at least one villager and one valid bed, the game begins treating that area as a village, enabling mechanics like iron golem spawning and raids.
Although Mojang regularly tunes game rules between updates, the core idea is stable: villages are groups of homes with beds, job site blocks, and villagers, placed in compatible biomes and recognized by the game as a settlement. Official documentation from Mojang describes villagers as passive mobs that inhabit villages, working, trading, and socializing
within those areas.1
Key Components of a Village
- Beds: Define how many villagers can live there and where they sleep.
- Villagers: The residents that take jobs, work, breed, and trade.
- Job site blocks: Assign professions such as farmer, librarian, or armorer.
- Bell or meeting point: A gathering site where villagers socialize and run during danger.
- Golems: Iron golems may spawn naturally to protect the village once enough beds and villagers exist.
2. Village Biomes and Variants
Villages can generate automatically in specific biomes, each using materials that match their surroundings and spawning villagers with unique outfits. This biome-specific design helps villages blend into the world and gives each settlement a distinct personality.
Where Villages Spawn
As of recent Java and Bedrock editions, naturally generated villages may appear in:
- Plains
- Desert
- Savanna
- Taiga (spruce-style villages)
- Snowy biomes (such as snowy plains)
Some versions and seeds also include rare abandoned villages, populated entirely by zombie villagers, with cobwebs and mossy stone scattered through the structures.
| Village Type | Typical Biome | Building Materials | Notable Traits |
|---|---|---|---|
| Plains | Plains, meadow | Oak wood, cobblestone | Most common; good starter village |
| Desert | Desert | Sandstone, sand | Houses without roofs in some variants; easy to spot |
| Savanna | Savanna | Acacia wood, terracotta | Orange-toned buildings; sloped terrain is common |
| Taiga | Taiga | Spruce logs, cobblestone | Cozy cabins, often surrounded by dense forest |
| Snowy | Snowy plains / icy regions | Spruce wood, snow blocks | Frozen farms; hostile mobs spawn frequently at night |
Finding Villages Efficiently
You can stumble into villages just by exploring, but there are faster methods:
- Explore on foot or by horse: Focus on the biomes listed above, especially plains and savannas, which are easy to navigate.
- Look for light at night: Lanterns and torches make village silhouettes visible from far away.
- Use the
/locatecommand (cheats enabled): Type/locate structure villagein newer versions to get coordinates. - Use seed mapping tools: Third-party online tools can map a world based on its seed and show nearby villages.2
3. Villagers: Professions, Schedules, and Behavior
Villagers are more than decorative NPCs. They follow daily routines, choose jobs, socialize, and respond to threats. Mojang’s technical notes describe them as having distinct work, rest, and meeting
phases that influence their movement around town.1
Villager Daily Routine
While exact timings vary between versions, villagers generally cycle through:
- Morning: Leave their beds, briefly mingle around the meeting point.
- Work hours: Employed villagers stand at or near their job site blocks, restocking trades.
- Afternoon: More social time at the bell or around paths; farmers tend crops.
- Evening: They return indoors and go to sleep in their beds.
Villager Professions and Job Site Blocks
A villager’s career is determined by the job site block it claims. Unemployed villagers (wearing plain robes with no emblems) will seek out free job site blocks and adopt the corresponding profession.
| Profession | Job Site Block | Typical Trade Items |
|---|---|---|
| Farmer | Composter | Food, crops, golden carrots, cookies |
| Librarian | Loom & Lectern (lectern defines the profession) | Enchanted books, bookshelves, name tags |
| Armorer | Blast Furnace | Iron and diamond armor pieces |
| Weaponsmith | Grindstone | Weapons and tool upgrades |
| Cleric | Brewing Stand | Ender pearls, redstone, glowstone |
| Cartographer | Cartography Table | Explorer maps (woodland mansions, ocean monuments) |
Each profession has its own trade progression, unlocking better deals as you trade more and increase the villager’s level (Novice up to Master).
Villager Breeding Basics
If you want to grow your village, you’ll need more villagers. Recent versions make breeding depend on two factors:
- Bed availability: There must be more beds than current villagers, and beds need sufficient vertical space.
- Food supply: Villagers must have enough food items (bread, carrots, potatoes, etc.) in their inventory to become “willing” to breed.
Official gameplay guides from Mojang’s educational spin-offs emphasize food and beds as the core requirements for sustainable village growth.3
4. Trading: Turning Villages into Resource Hubs
Trading with villagers lets you convert common resources into rare items, powerful tools, and enchanted books. Properly managed, a single village can replace long mining trips and dangerous nether fortress hunts.
Understanding the Trade System
- Emeralds as currency: Most trades revolve around emeralds; you obtain them by selling items to villagers or find them in loot.
- Trade levels: Each profession has five levels. Trading fills a bar that levels up the villager and unlocks new trades.
- Supply and demand: Trading the same option repeatedly can increase its price or temporarily lock it until the villager restocks.
- Reputation: Protecting villagers and curing zombie villagers can decrease prices across the village.
Best Early-Game Trades
If you reach a village early in a world, prioritize these trades to get started efficiently:
- Farmer: Sell wheat, carrots, potatoes, or pumpkins for emeralds. Farms are easy to automate, making farmers a renewable emerald source.
- Librarian: Buy enchanted books (like Mending or Unbreaking) for emeralds and a book. Refilling the lectern can reroll the book until you get a desirable enchantment.
- Armorer & Weaponsmith: Trade coal or iron early on, then buy enchanted diamond armor and tools once they level up.
5. Protecting Villages from Mobs and Raids
Unprotected villages tend to collapse quickly under pressure from zombies, skeletons, and pillagers. The game’s raid mechanic in particular can wipe out an entire community if you are not prepared. According to Mojang’s official raid descriptions, waves of pillagers, vindicators, and other illagers spawn around the village when a player with the Bad Omen effect enters the area.4
Basic Defensive Measures
When you first find a village, implement these quick defenses:
- Light up the area: Place torches or lanterns on paths, roofs, and fields to reduce hostile mob spawns at night.
- Fence perimeters: Surround the village with fences or walls at least two blocks high, adding gates for yourself.
- Secure doors and beds: Make sure houses have doors, and block direct access where zombies might break in.
- Protect the bell: Keep the bell accessible; during raids it helps you locate enemies and encourages villagers to hide.
Iron Golems: Natural Guardians
Iron golems spawn naturally when a village has enough beds and villagers. They attack hostile mobs targeting villagers and can be healed using iron ingots. Their mechanics are similar across Java and Bedrock editions, although exact spawn conditions vary slightly between updates, as recorded in Mojang’s technical changelogs.1
You can also build your own iron golem by placing four iron blocks in a T-shape and a carved pumpkin on top. This is particularly useful in small or custom villages that might not spawn golems on their own.
Handling Raids Safely
Raids are triggered when a player with the Bad Omen status enters a village. You get Bad Omen by killing a pillager captain (recognizable by the banner on its back). During a raid:
- Waves of enemies appear around the village, including pillagers, vindicators, ravagers, witches, and evokers.
- Villagers run indoors and ring the bell (or you can ring it) to locate nearby enemies with glowing outlines.
- Defeating all waves rewards you with the Hero of the Village effect, temporarily lowering trade prices.
To prepare for raids, equip decent armor, a bow with plenty of arrows, and build elevated platforms or walls to fight from. Keep buckets of milk handy to remove Bad Omen if you don’t want to trigger a raid near your favorite settlement.
6. Expanding and Customizing Your Own Village
Once you understand the basics, you can expand a simple village into a fully customized town or trading hall. Builders in the Minecraft community often design elaborate city walls, themed districts, and automated farms that feed directly into villager trade loops.
Adding New Housing and Beds
To grow your population, gradually add:
- New homes with beds: Ensure each bed has two blocks of headroom and a path villagers can use to reach it.
- Lighting: Interior and exterior lighting prevents mobs from spawning in new structures.
- Pathways: Villagers prefer walking on paths; connecting homes with path blocks or other low-cost blocks improves movement.
Building a Trading Hall
Trading halls centralize villagers in a secure, well-organized structure.
Basic design ideas:
- Individual stalls: Place each villager behind a fence or in a small booth with their job site block and bed nearby.
- Mob-proofing: Use solid blocks, iron doors, and sufficient lighting to prevent zombies from reaching villagers.
- Easy access: Group similar professions together (all librarians in one wing, farmers in another) for efficient trading.
Integrating Farms and Automation
With villagers and redstone, you can automate many resource loops:
- Crop farms: Farmers can automatically plant and harvest crops within walled fields, feeding hoppers and chests.
- Iron farms: Advanced designs intentionally spawn and kill iron golems to produce iron ingots continuously. Community guides have documented numerous 1.20+ compatible designs using beds, villagers, and controlled spawn platforms.5
- Trading loops: Use automatic farms to generate pumpkins, melons, paper, and sticks, then trade the output for emeralds.
7. Advanced Tips and Common Mistakes
Once you’ve secured and expanded a few villages, you may run into more subtle mechanics that can either help or hinder your plans.
Preventing Villager Loss
- Keep villagers inside at night: Make sure doors are accessible and pathfinding is not blocked.
- Avoid steep drops and open water: Villagers can get stuck in ravines, caves, or lakes, effectively removing them from daily routines.
- Trap doors and carpets: Use them to prevent villagers from entering dangerous areas while still allowing you to move freely.
Managing Professions Carefully
- Lock in trades: Once you have a villager with a desirable trade (like a Mending librarian), trade with them at least once to lock their profession permanently.
- Breaking job site blocks: If you want a different trade from an unemployed or low-level villager, break the job site block and place it again until you get good offers.
- Keep workstations accessible: Villagers must reach their job site during work hours to restock items.
Handling Cross-Version Differences
Java and Bedrock editions share the same basic village logic but differ in small details like spawning rules, movement preferences, and bug behavior. Mojang’s dedicated knowledge bases for each edition document these nuances for players who want precise technical information.1,4 When following tutorials or redstone builds online, always confirm whether they’re designed for your edition and version number.
8. Frequently Asked Questions About Minecraft Villages
How many villagers do I need for a village?
Technically, one villager and one valid bed are enough for the game to register a village. However, for natural iron golem spawning and effective trading, you’ll want several villagers and multiple beds.
Do villagers need food to survive?
Villagers do not starve, but they do require food items in their inventory to become willing to breed. Farming and tossing food to them is the best way to grow the population.
Why did my villagers stop trading?
If a villager’s trade shows a red X or says it is out of stock, it has used up its current supply. Let the villager reach its job site during work hours to restock, usually once or twice per day.
How do I stop zombies from infecting villagers?
Light the area, use walls or fences, and make doors or trapdoors to keep villagers indoors at night. In hard difficulty, zombies can break wooden doors, so consider iron doors or alternative entrances.
Can I cure zombie villagers?
Yes. Throw a splash potion of Weakness on the zombie villager, then right-click with a golden apple. After a few minutes, it becomes a normal villager. Cured villagers often give significantly discounted trades, which can be stacked for major savings.1
References
- Minecraft: Java Edition – Technical information on villagers and raids — Mojang Studios / Minecraft Help Center. 2023-10-12. https://help.minecraft.net/hc/en-us/articles/4408969974676
- Seed Map – Minecraft App Documentation — Chunkbase. 2022-06-01. https://www.chunkbase.com/apps/seed-map
- Using Minecraft to Teach Math and More — Microsoft Education / Minecraft: Education Edition. 2022-05-05. https://education.minecraft.net/en-us/resources
- Minecraft: Bedrock Edition – Illager Raids Explained — Mojang Studios / Minecraft Wiki (official game documentation mirror). 2023-07-15. https://www.minecraft.net/en-us/article/meet-pillager
- Minecraft 1.20 Technical Changes: Villager and Iron Golem Mechanics — Mojang Studios / Minecraft Changelog. 2023-06-07. https://www.minecraft.net/en-us/article/minecraft-1-20-release-changelog
Similar Articles








Read full bio of medha deb