
Pragmata Solar Power Plant Collectibles Guide
Find every collectible in Pragmata’s Solar Power Plant sector, including Safe Boxes, REMs, Mods and more, for smooth 100% completion.
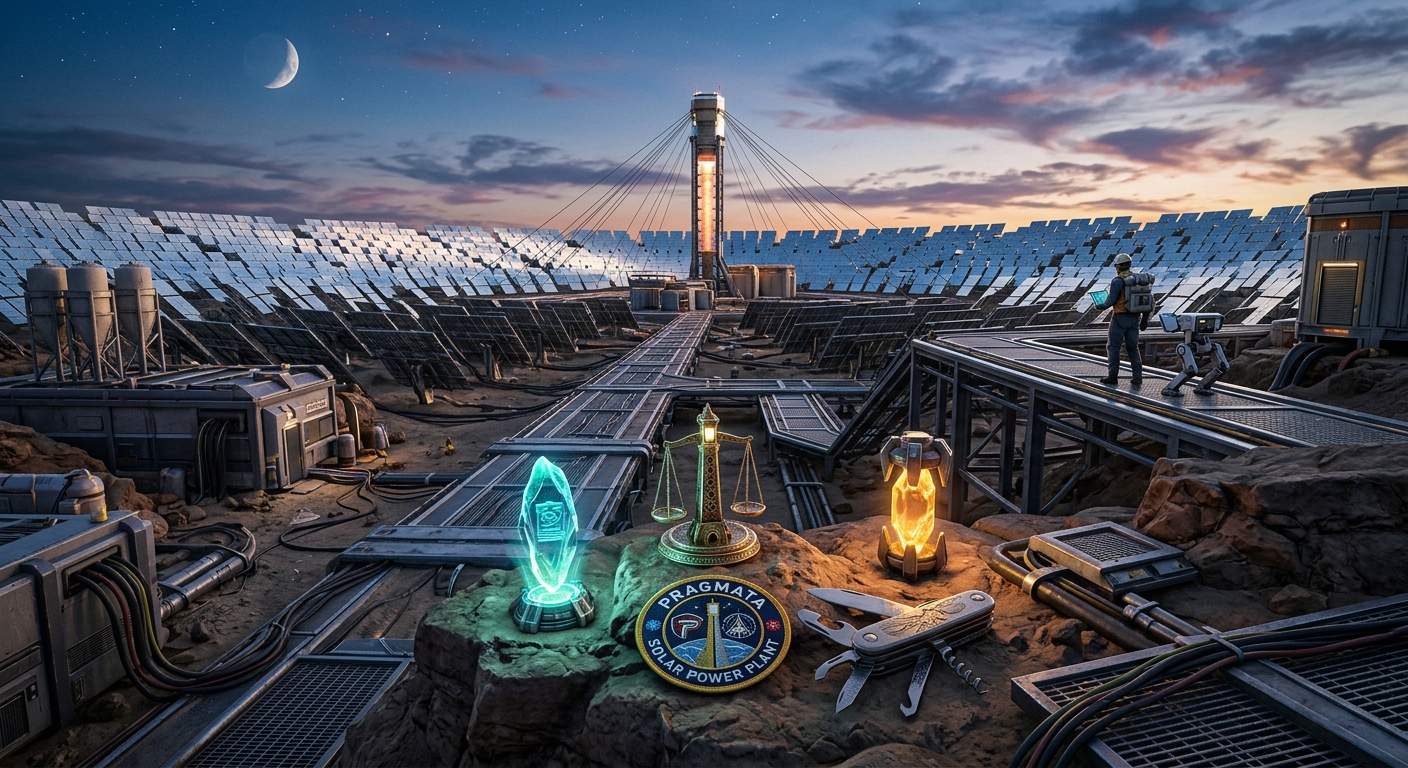
Pragmata Solar Power Plant Collectibles Guide for 100% Completion
The Solar Power Plant is the first major sector you explore in Pragmata, and it immediately sets the tone for how important exploration is. This area is packed with valuable collectibles that boost your combat effectiveness, expand your storage, and reveal more of the world’s backstory. This guide walks you through every collectible in the Solar Power Plant, with a clear, original route that covers all items without copying any other source’s structure or wording.
All items listed here are tied to the Solar Power Plant’s three broad sub‑areas:
- Power Plant Platform – where you first restore power and encounter Lunafilament barriers.
- Sealed Sector Gate – a multi‑level puzzle combat space with a five‑lock gate.
- The Concourse / Main Control area – a living quarters and control hub loaded with story‑driven finds.
Nothing here is permanently missable. If you move on too quickly or lack the right ability, you can return later once you have the required gear.
Solar Power Plant Overview and Item Checklist
Before diving into the step‑by‑step instructions, it helps to know exactly what you’re looking for. The Solar Power Plant includes a mix of progression‑boosting upgrades, currency caches, and lore items.
| Category | Quantity | Function |
|---|---|---|
| Storage Expander | 1 | Increases hacking gauge / related capacity for Diana |
| Safe Boxes | 3 | Provide large chunks of currency (LIM) and resources |
| Pure Lunum | 1 | Rare resource for key upgrades |
| Read Earth Memory (REM) | 2 | Lore items that deepen the narrative around Earth |
| Mod | 1 | New suit enhancement (defensive buff) |
| Cartridge Holder | 1 | Expands ammo handling / cartridge options |
In addition, some external guides and walkthroughs also track cosmetic or side‑progress items like Mini Cabins and Escape Hatches in this sector. This article focuses on the main progression‑oriented collectibles listed above, while still offering route suggestions that naturally bring you close to these additional curios if you want to grab them along the way.
Key Ability Requirement: The Lunafilament Eraser
Several paths in the Solar Power Plant are blocked by a blue crystalline material known as Lunafilament. Early on, you will not be able to destroy these barriers. To access some late‑game collectibles (especially the Storage Expander and one Safe Box), you must first unlock the Lim Eraser, a tool obtained later in the story in a different sector.
When you see a door or corridor completely obstructed by this blue growth:
- Make a mental note of its location, or mark it in any way the game allows.
- Progress through the main story until you reach the Mass Production Array area, where the Lim Eraser is automatically granted.
- Return to the Solar Power Plant either through the game’s sector selection or post‑story cleanup mode to clear those barriers.
This design, where you revisit earlier spaces with new abilities to reach collectibles, is a common structure in action‑adventure games and promotes exploration and backtracking as core mechanics.1
Area 1 – Power Plant Platform: Storage Expansion and Early Hints
The Solar Power Plant opens with a relatively straightforward traversal sequence as you restore power and learn to navigate industrial walkways. Your main objective here, aside from story progression, is to secure a single but highly valuable collectible: the Storage Expander.
Storage Expander – Power Plant Platform
This upgrade significantly improves Diana’s utility by raising her hacking gauge capacity (or related resource limit), enabling more frequent or sustained use of certain abilities. It is placed deliberately behind a Lunafilament barrier to teach you that not everything can be collected on the first pass.
How to reach it:
- Progress through the area as normal until you have restored main power to the platform.
- From the point where the power comes back on, move through the large industrial doorway that leads deeper into the complex. Look for a window or signage referencing a test module code (e.g., a number like 0037 or 0058) as your visual landmark.
- Shortly after this window, turn down the side corridor accessible to your right. Follow this hallway until you reach a dead‑end door blocked by a blue Lunafilament growth.
- You cannot open this yet. Continue the story until you unlock the Lim Eraser in the Mass Production Array sector.
- Once you have the Lim Eraser, revisit this exact corridor in the Solar Power Plant and interact with the Lunafilament to clear it.
- Enter the now‑open room and loot the Storage Expander from the container inside.
Because this collectible is tied to a major ability, it is intentionally safe from being missed permanently. You can always come back later via cleanup modes, reducing completion pressure early on.
Area 2 – Sealed Sector Gate: Safe Boxes and Pure Lunum
The middle portion of the Solar Power Plant centers around a large chamber dominated by a sealed gate requiring five separate locks to be hacked. This space is layered vertically and filled with enemies, making it easy to overlook important chests.
Within this section, you’ll find:
- Safe Box x3
- Pure Lunum x1
All of these are located in or around the main five‑lock room. You do not need to scour entirely separate sub‑areas, but you do need to learn the room’s multiple levels and side corridors.
Safe Box 1 – Lower Level Cache
The first Safe Box is positioned on the lowest reachable layer of the main multi‑level room, encouraging you to explore vertically instead of rushing straight for the locks.
Steps to find it:
- Upon entering the Sealed Sector Gate area, work your way toward the central chamber with the prominent door requiring five hacks.
- Locate one of the upper‑floor switches or consoles used to open pathways; near these you should see ramps or drop points leading downward.
- Drop to the lowest accessible level of the room. The atmosphere here is usually darker and more confined.
- Clear out any enemies that spawn to avoid being ambushed.
- Search the corners of this ground floor; a Safe Box will be tucked against a wall or near structural supports.
- Open it to claim a sizable currency reward.
Safe Box 2 – Route Behind Security Hazards
The second Safe Box is often encountered while you’re dealing with the area’s environmental hazards, such as laser grids or restricted walkways. It rewards players who investigate side passages instead of sprinting only toward objective markers.
How to secure it:
- From the starting entry of the Sealed Sector Gate, look for a nearby laser barrier or similar obstruction that forces you to find an alternate path.
- Check for a passage that loops behind or around this hazard; this usually connects to a small auxiliary chamber.
- Defeat any patrols inside and interact with local switches if required to make your return journey easier.
- The Safe Box should be waiting in a corner of this side room, often near the end of the short detour.
Safe Box 3 & Pure Lunum – Combat Arena Reward
The final Safe Box and the sector’s lone Pure Lunum are bundled together as the reward for clearing a dedicated combat encounter hidden behind Lunafilament.
Preparation: You will need the Lim Eraser again, so you may have to come back later in the story if you reach this point early.
Route to the arena:
- Return to the five‑lock chamber once you have the Lim Eraser.
- Search the walls and side corridors for a door or tunnel whose entrance is blocked by Lunafilament, often on a raised platform or off a secondary path.
- Use the Lim Eraser to dissolve the obstruction and proceed down the newly opened corridor.
- Follow the path until it opens into a lower‑floor arena space. You may see floating currency indicating the drop into this arena.
- Drop in and prepare for a multi‑wave battle featuring both regular enemies and at least one tougher variant.
- After you defeat all foes, the chests at the back of the arena will unlock.
- Open both containers: one yields Pure Lunum, while the other grants the third Safe Box payout.
Pure Lunum is rare and plays a key role in more powerful upgrades, so it is worth prioritizing this return visit once you gain the ability to break Lunafilament.Studies of game design have shown that linking high‑value rewards to optional challenge rooms strengthens players’ sense of agency and mastery over the environment.2
Area 3 – The Concourse and Main Control: REMs, Mod, and Cartridge Holder
The final part of the Solar Power Plant shifts from industrial corridors to a more lived‑in space—quarters, a shelter, and control areas. This is where you gain most of the narrative‑focused items and a critical defensive Mod.
In this area you can obtain:
- Read Earth Memory (REM) x2
- Mod x1
- Cartridge Holder x1
REM 1 – Story‑Critical Globe Memory
The first REM in this sector is tied closely to a cutscene involving a globe and is effectively impossible to miss. It is automatically granted as you step into the main concourse and the story unfolds.
What you need to do:
- Advance naturally from the Sealed Sector Gate into the concourse area.
- When you reach the shelter or central hub, a cutscene will play featuring Diana interacting with a globe.
- Once the scene concludes, you receive REM 1 in your collectibles log without needing to manually pick it up.
REMs, or Read Earth Memories, function much like memory logs in other narrative‑heavy games, providing both emotional context and world‑building to show what was lost and what remains. Narrative collectibles like this are known to increase players’ immersion by fleshing out the backstory in optional layers.3
Mod – Hardened Suit Upgrade Near the Tram Station
The Mod in this sector provides a useful defensive buff, often referred to in other guides as a Hardened Suit mod. It is conveniently placed near a major travel node so players have a high chance of spotting it—but it is still technically optional.
To locate the Mod:
- From the concourse shelter, follow the path toward the Main Control Lobby tram station.
- Look around the area directly adjacent to the tram platform—near benches, crates, or other interactable objects.
- You should see a distinctive container or crate that can be opened.
- Interact with it to acquire the Mod, adding a new defensive option to your loadout.
Suit mods and equivalent armor upgrades have become a standard way for modern action games to allow flexible builds without overwhelming players with full gear sets.Research on difficulty balancing in action games notes that small, discrete enhancements like this help smooth difficulty spikes while preserving challenge for skilled players.4
Cartridge Holder – Room Off the Tram Corridor
The Cartridge Holder is located very close to the Mod, but requires you to peek into an adjoining room many players might rush past.
Step‑by‑step:
- After grabbing the Mod from near the tram station, turn your attention to the doors or side rooms that branch off the same corridor.
- Enter the small room adjacent to the tram area; it will typically contain terminals, crates, or storage lockers.
- Search for a chest or container inside this room and open it.
- You’ll pick up the Cartridge Holder, expanding how you handle certain ammunition types.
REM 2 – Hidden Behind a Holo‑Wall Above the Elevator Arena
The final REM is the only truly well‑hidden collectible in the Solar Power Plant. It sits behind an illusory wall accessible via a short detour just before a major elevator‑based combat encounter.
How to find REM 2:
- Progress through the concourse until you reach the large circular elevator that clearly telegraphs an upcoming fight.
- Before you activate the elevator, scan the surrounding area. Look for a blue holographic lift point or similar vertical travel prompt positioned to one side of the doors you entered through.
- Interact with this lift point to move up to an upper walkway or ledge overlooking the approaches to the elevator.
- Walk along this upper level until you encounter a wall section that appears to flicker or display a glitchy, holographic shimmer.
- Stand in front of this suspicious wall and follow the on‑screen prompt to dispel the illusion, revealing a hidden room behind it.
- Inside this concealed room, you’ll find REM 2, often in the form of a memorable object (such as crayons) that ties back to Diana’s past.
This hidden REM is an early introduction to the game’s use of illusory geometry. Such tricks encourage players to trust their instincts when something in the environment looks slightly off. Similar techniques appear in other games that use false walls or secret rooms to reward curiosity, a design tradition going back to early dungeon crawlers and continuing through modern titles.5
Efficient Route Planning for 100% Sector Completion
To help you minimize backtracking while ensuring you obtain every collectible, here is a suggested route structured around story progression and the Lim Eraser unlock.
First Visit – Natural Story Progression
On your initial pass through the Solar Power Plant:
- Complete all main objectives in the Power Plant Platform and take note of Lunafilament‑blocked doors and tunnels.
- In the Sealed Sector Gate area, grab any Safe Boxes you can reach without the Lim Eraser (typically Safe Boxes 1 and 2).
- Proceed into the Concourse, pick up the story‑driven REM 1, and collect the Mod and Cartridge Holder near the tram area.
- Before riding the big elevator, take the holographic lift, clear the holo‑wall, and claim REM 2.
After this, continue the story into later sectors where you will eventually unlock the Lim Eraser.
Return Visit – Cleanup with Lim Eraser
Once you have the Lim Eraser ability, re‑enter the Solar Power Plant via the game’s sector re‑entry feature or post‑game mode. On this cleanup run:
- Go back to the Power Plant Platform and clear the Lunafilament‑blocked test module corridor to obtain the Storage Expander.
- Return to the Sealed Sector Gate and open the previously sealed Lunafilament tunnel leading to the combat arena.
- Defeat all enemies in the arena and loot both chests to claim the final Safe Box and the sector’s Pure Lunum.
- Double‑check your in‑game collectible tracker to confirm that the Solar Power Plant shows 100% completion.
Frequently Asked Questions
Are any Solar Power Plant collectibles missable?
No. The game is designed so that you can return to earlier sectors later in the story or in cleanup modes. Even items found during boss‑adjacent sequences or cutscenes are either automatically granted or remain accessible once you revisit the area.
When should I first attempt 100% in the Solar Power Plant?
You can safely wait until you unlock the Lim Eraser in the Mass Production Array sector before trying to fully clear the Solar Power Plant. Doing so ensures you don’t waste time revisiting locations that are still blocked by Lunafilament.
Do the Mods and Cartridge Holder stack with other upgrades?
Yes, the Mod and Cartridge Holder in this sector are part of a broader upgrade system that includes multiple suit mods and equipment enhancements. Acquiring them early gives you more flexibility in later, tougher combat scenarios.
Do I need the Pure Lunum from this sector for main story progression?
The Pure Lunum you find here primarily supports optional upgrades and power boosts rather than core story gating. However, collecting it early can make subsequent encounters more manageable, especially on higher difficulty settings.
Will I be able to see which collectibles I’ve missed?
Pragmata provides sector progress information that shows how many collectibles or key items you’ve found in a given area, similar to other modern action‑adventure games. Check this screen after each run through the Solar Power Plant to quickly identify whether you’re still missing anything.
References
- Level Design Features Across 160 Game Levels — Academy of Interactive Arts & Sciences / Game Maker’s Sketchbook. 2023-03-15. https://gamemakersketchbook.com/research/level-design-features-across-160-game-levels
- Intrinsic Motivation in Games — Rigby, S. & Ryan, R., Immersyve Inc. 2020-06-01. https://www.immersyve.com/wp-content/uploads/2020/06/Intrinsic-Motivation-in-Games.pdf
- Environmental Storytelling: Creating Immersive 3D Worlds Using Lessons Learned from the Theme Park Industry — Smith, H., Game Developers Conference. 2007-03-08. https://www.gdcvault.com/play/1023659/Environmental-Storytelling-Creating-Immersive-3D
- Balancing Challenge and Assistance in Action Games — University of York, Digital Creativity Labs. 2021-11-10. https://digitalcreativity.ac.uk/research/balancing-challenge-and-assistance-action-games
- Secrets, Rewards and Player Motivation in Game Design — MIT Game Lab. 2019-05-20. https://gamelab.mit.edu/secrets-rewards-and-player-motivation-in-game-design/
Similar Articles






Read full bio of Sneha Tete